Turning Dev Mode On to connect via USB
You just received your shiny new Oculus Quest and have found us. Now what?
Make sure to set up your device for sideloading and enable adb access from your PC. Here is a guide to get started
To allow installing apps & games to your headset, you must be recognized as a developer. To do this, you have to be a registered "developer" on the Oculus website. This process is free, quick, and easy to set up.
Have you already enabled dev mode before but lost it? Is your “unknown sources” tab gone? Skip to step 3 and remove your phone/credit card and re-add it.
New requirements in August 2021! If you previously verified, it does not matter. Please see the 3 methods at step 3, you MUST do one of these or it will not work!
Step 1: Joining or Creating an Organization
- To create an organization, go to https://developer.oculus.com/manage/organizations/create/.
- Fill in the appropriate information.

Step 2: Verify Your Account
- Go to https://developer.oculus.com/manage/verify/.
- If prompted, log in with your Oculus Developer account.
- Verify your account with a credit/debit. (MUST)
- Make sure not to delete the verification method you used, or you will lose developer mode when you restart your headset.
Step 3: Verify your Developer Account
Once you belong to a developer organization, follow these steps to put your device in developer mode:
Step 3 Option : Credit/Debit Card (requires mobile device)
Verify your account by adding a CC here
The card does not need to be in your name.

Step 4: Enable Developer Mode on your Headset
- In your headset, sign in to the developer account you want to use for development.
- Go to Menu, then Devices in the Oculus mobile app.
- Select your headset from the device list and wait for it to connect.
- Select Headset Settings
- Select Developer Mode
- Turn on Debug Mode

Step 5: Installing USB drivers
Windows Only
Install the driver software for your device. Go here on your PC and download the drivers for your headset. The Oculus Go drivers work for the quest also. To install the drivers, extract the zip folder, right-click the android_winusb.inf file, and click install.THen reboot. You Must Reboot After This Step!
Connect USB Cable and Allow USB Debugging
Now it's time to connect the USB cable. Once you are connected, you will have to allow USB debugging access on your headset via Notifications.
Put your headset on, click on the Notifications Bell (1), and then select the USB Detected notification (2). You will have to click this each time you reconnect your headset with a USB Cable.

That's it! You should now be able to see your device ID in Rookie Sideloader or by running any other adb-based tools such as sidenoder or sidequest! Sideloaded apps can be found under Unknown Sources in your Quest's app library.
Connect USB Cable and Allow USB Debugging (pre-v51)
Now it's time to connect the USB cable. Once you are connected, you will have to allow USB debugging access on your headset. If you put your headset on at this point, you will see something like the below. You should also select 'Always allow from this computer' to prevent this message from coming up every time you connect. Please be aware that after allowing USB debugging, a different prompt will be displayed each time you connect your headset to your computer, shown below.

ALWAYS click 'Allow', NEVER 'Don't show again', otherwise you will lose the ability to use adb-based tools until you re-enable 'USB Connection Dialog' from your headset's System/Developer settings.

_________________________
Install SideQuest on your computer
, download and run the ‘Advanced Installer’ for your Windows operating system, which will install SideQuest and the necessary drivers for sideloading. (if you use mac, please go to sidequest website and grab the mac version).
Allow USB debugging between your computer and your Quest
After opening SideQuest and connecting your Quest to your computer, a prompt to “Allow USB debugging” will show up inside your headset. Click OK and tick ‘Always allow’ to ensure you don’t have to repeat this step in the future.
Sideloading Apps and Games via PC/Mac/Linux
Before sideloading, check SideQuest can connect to your Quest — the top left should show a green dot, pictured below.

If your Quest is connected via USB but SideQuest is showing a red dot, double check that your Quest is on, connected properly and you followed the USB debugging steps correctly.

Sideloading Games:
All you need to do is click on the ‘install APK file from folder’ button (see below, circled in red).

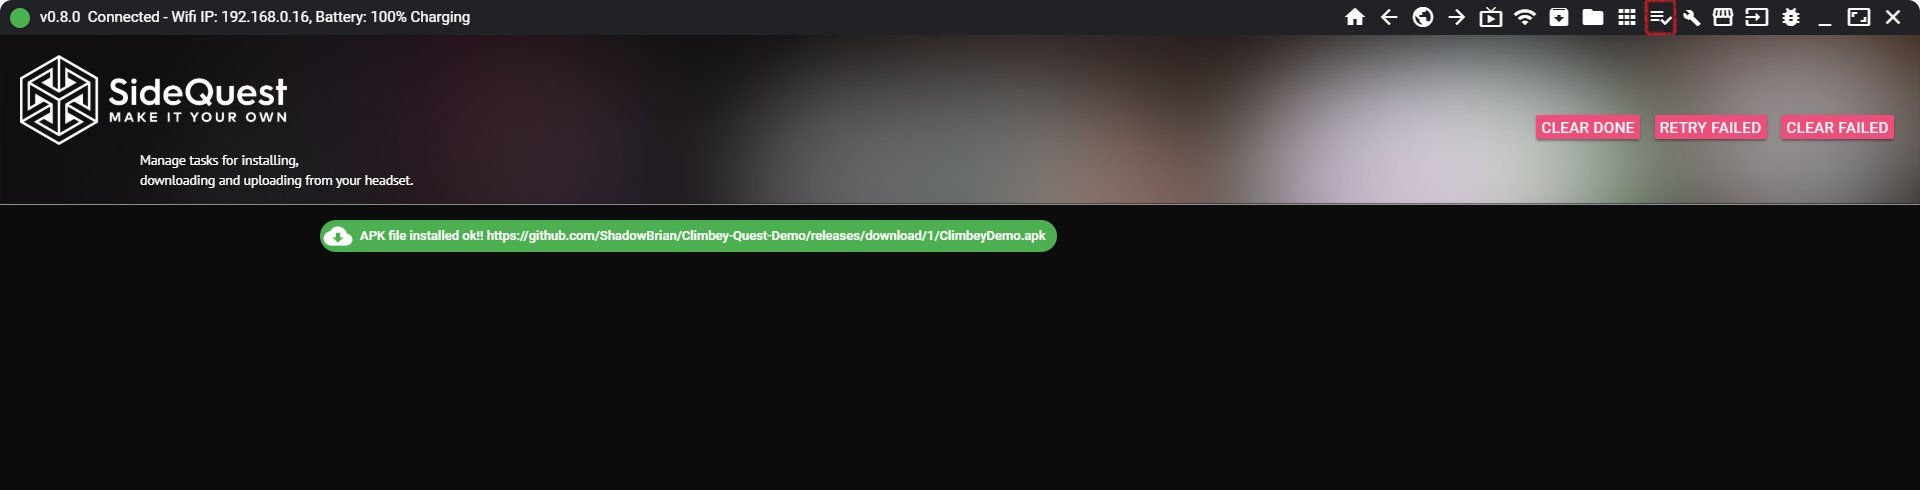
This will allow you to locate and select the APK file you downloaded from Yams, which SideQuest will then install. You can check the install is successful in the ‘Tasks’ tab, as described above.
you can click on the ‘Tasks’ button on the top right (circled in red below) to check progress. If the app was downloaded and installed correctly, you will see a bar reading “APK file installed ok!!” (also pictured below).